Single Sign-On Configurations
You need to subscribe to Katalon Platform Ultimate plan. See: TestOps Trial Plans.
Configure an identity provider
To generate metadata for SSO configuration in Katalon TestOps, you need to set up an identity provider as follows:
- Single sign-on SSO URL:
https://sso.katalon.io/saml/SSO - SP Entity ID:
com:katalon:testops - Attribute statement:
Email
The values for the above configurations are case-sensitive.
Your metadata is then automatically encrypted in the Katalon database. To learn more about the identity provider, you can refer to this Okta document: Identity Providers.
Configure Single Sign-On
You must be an Owner or Admin of an Organization.
You have configured a Subdomain. See Configure a Subdomain for an Organization.
You have configured an identity provider for SSO in Katalon TestOps, see above: Configure identity provider.
As an Owner or Admin, you can configure SSO by following these steps:
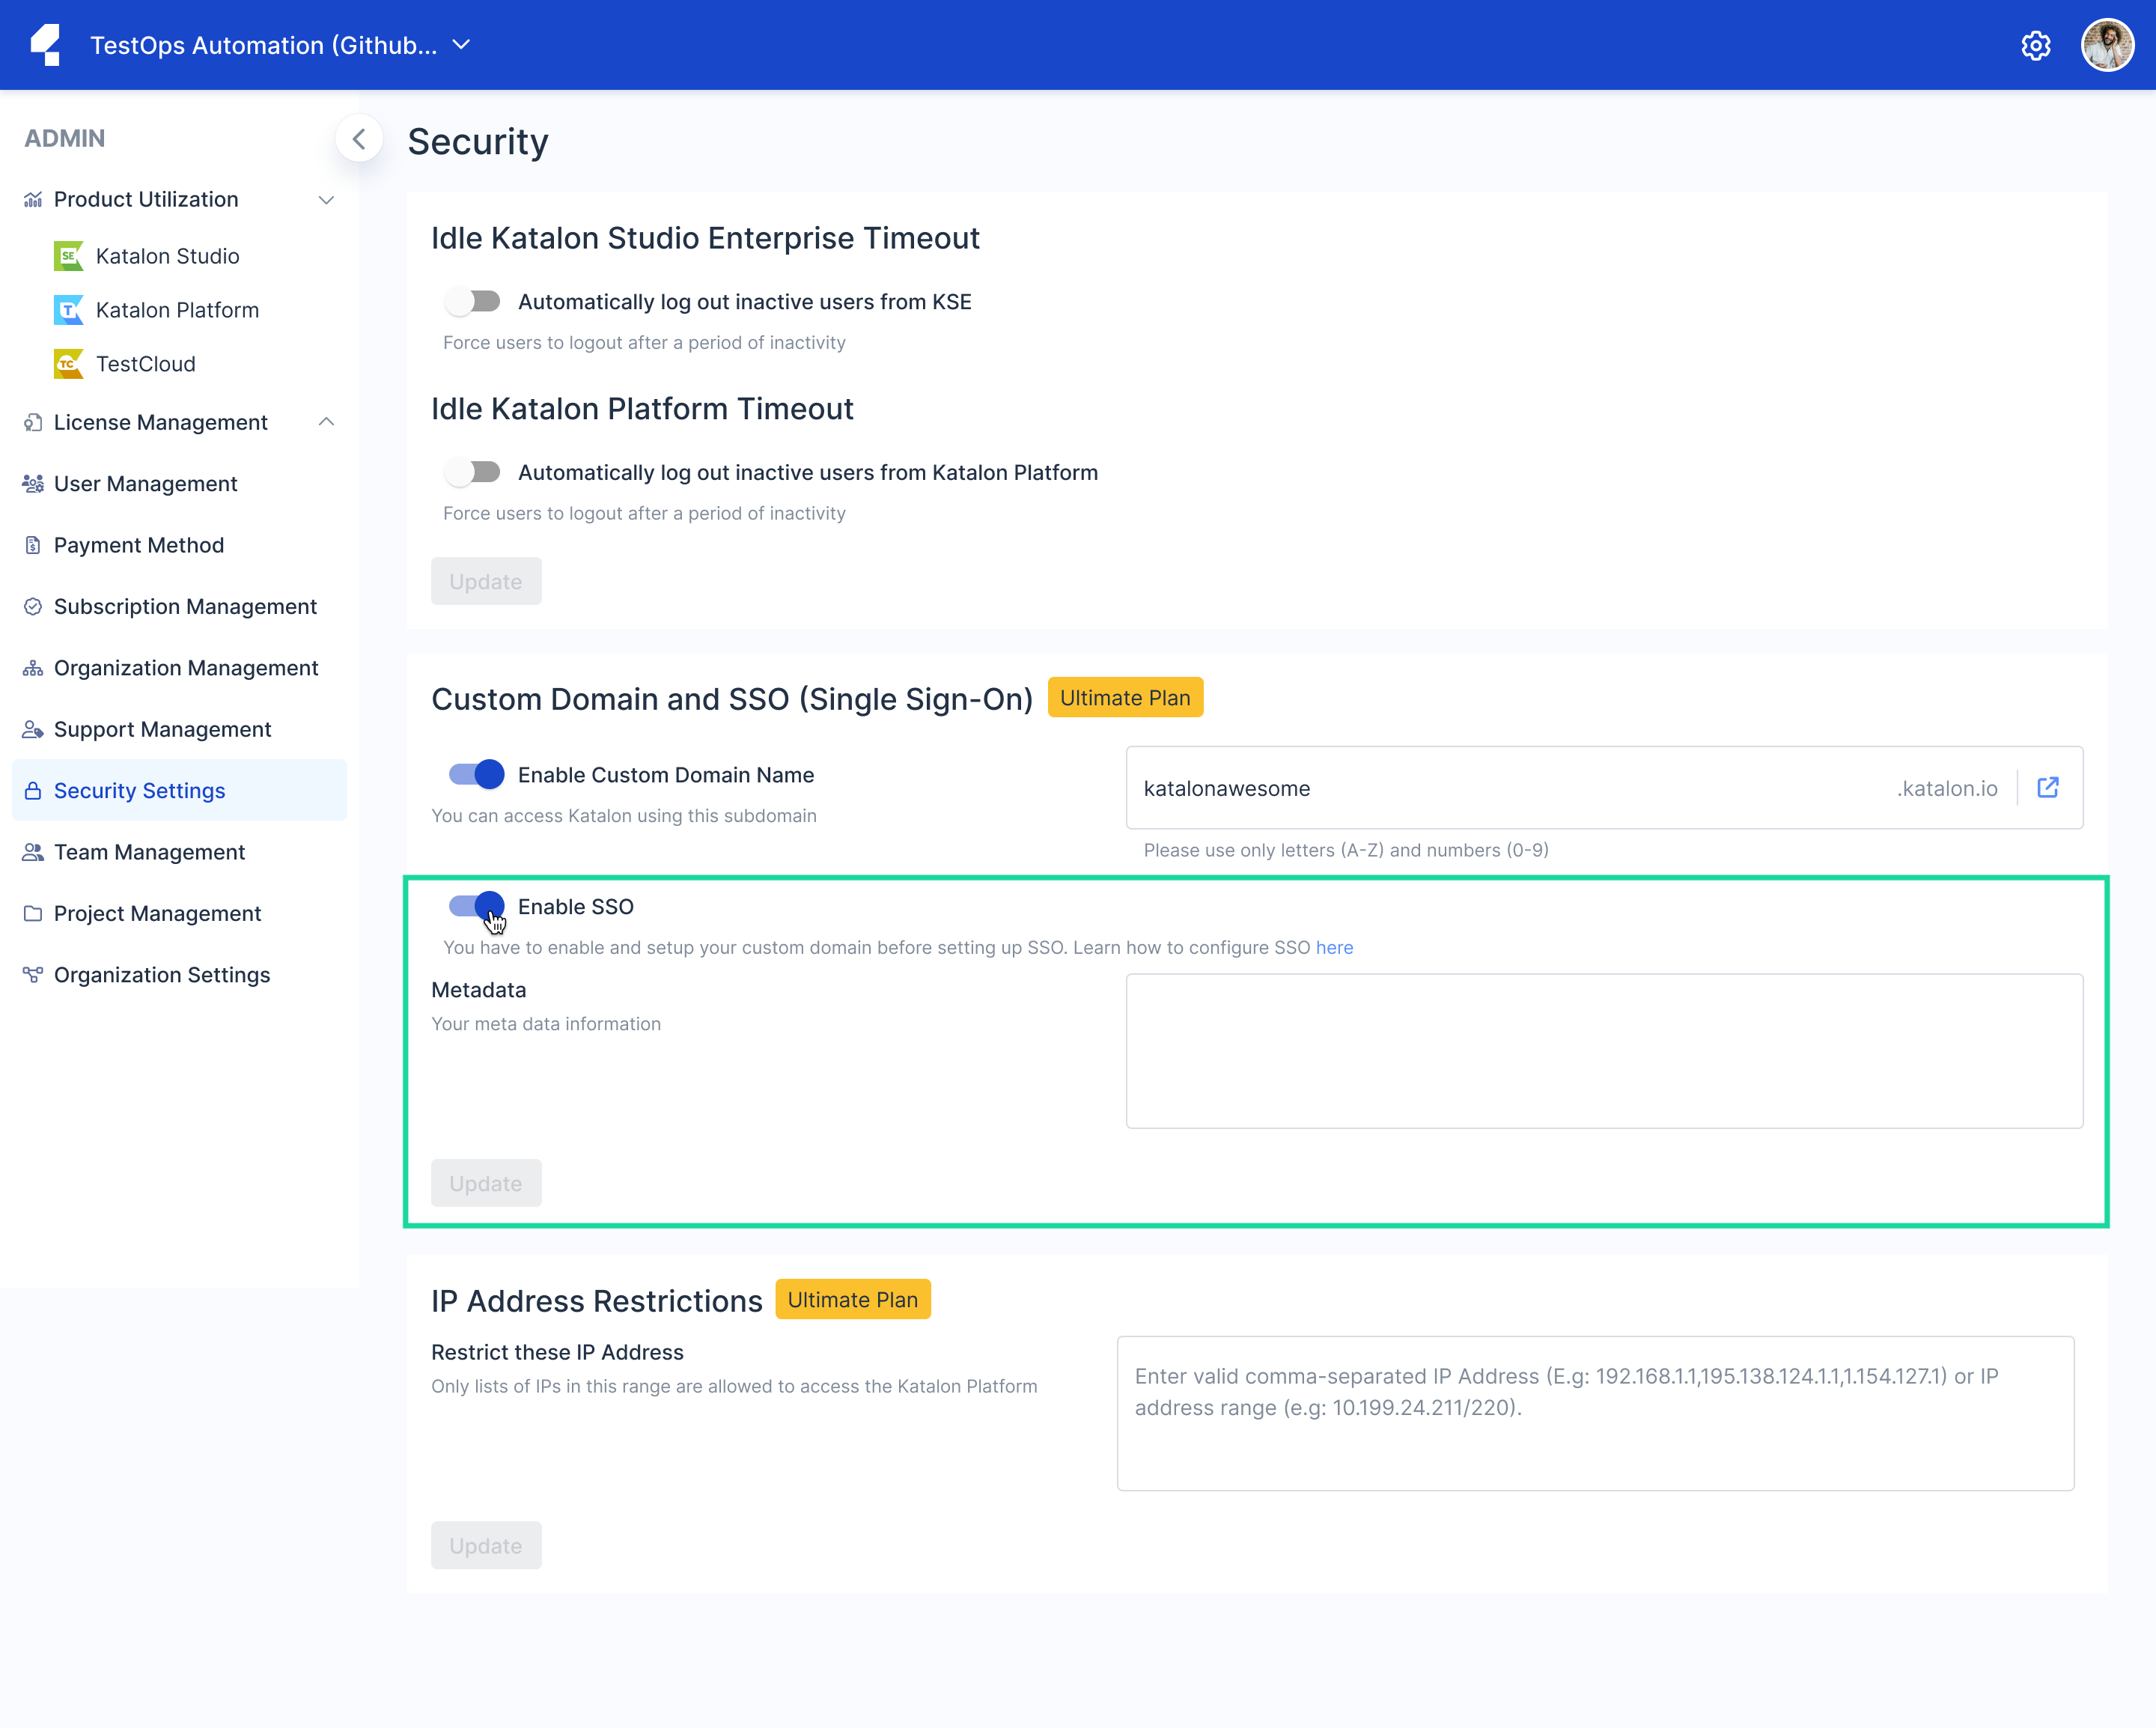
- Select Security Settings on the left bar, then scroll down to the Custom Domain and SSO (Single Sign-On) section.

- Toggled on Enable SSO.
Metadata text box appears.
Enable SSO for new members and existing members
After configuring SSO, you can enable SSO for new members when inviting them to your Organization.
You can also enable SSO for the existing members of your Organization. To learn more about user management in TestOps, refer to this guide: User Management.
For a new User
To enable SSO for a new User, follow these steps:
-
Go to Settings > User Management.
The User Management page appears.
-
On the top-right corner of the User Management page, click on the Invite User button.

-
In the displayed User Invitation window, insert the new User's email address.

-
In the Login Settings section, toggle on the Log in to [custom.katalon.io] by Single Sign-On option.

Note:-
You can choose to select or deselect both options.
-
-
Click Next to continue the User invitation process as usual.
Once the User invitation process is completed, an email is sent to the User asking them to join the Organization. After the User joins the Organization, they will receive a request email to enable SSO.
For an existing User
To enable SSO for an existing User, follow these steps:
-
Go to Settings > User Management.
The User Management page appears.
-
In the Active Users tab, nagivate to a User's row, click on the more options icon, and select Edit Login Options.

-
In the new Login Settings pop-up, toggle on the Log in to [custom.katalon.io] by Single Sign-On option.

Note:-
You can choose to select or deselect both options.
If the selected User already has a pending SSO invitation, the pop-up will display the invitation link. You can copy this link to send to the User.

-
-
Click Save to complete the configuration.
A request email is then sent to the selected User.
Users must join the Organization to log in to the custom domain by either SSO or username and password.
View Pending SSO invitations
To view the pending invitations and SSO requests, in the User Management page, switch to the Pending Invitation tab.

Users with pending SSO invitations are tagged with the SSO icon.
Revoke pending SSO invitations
As an Owner or Admin, you can revoke pending SSO invitations.
For existing Users
To revoke pending SSO invitation for Users who join the Organization, follow these steps:
-
In the User Management page, switch to the Active Users tab.
-
In the Active Users tab, nagivate to the desired User's row, click on the more options icon, and select Edit Login Options.
-
In the new Login Settings pop-up, toggle off the Log in to [custom.katalon.io] by Single Sign-On option.
For new Users
To revoke pending SSO invitations for Users who have not joined the Organization, follow these steps:
-
In the User Management page, switch to the Pending Invitation tab.
-
Select the Users with SSO invitations that you want to revoke, then click on the Revoke SSO button.

-
In the Revoke Single Sign-On Invitation pop-up, verify the list of selected Users and click on the Revoke SSO button.

The SSO invitation links sent to the selected Users will be revoked.
Activate SSO in Katalon Studio
After configuring SSO in Katalon TestOps, you must reactivate Katalon Studio to enable SSO.
Follow these steps:
-
Open Katalon Studio.
-
Click on the Profile icon at the top right corner, and select Deactivate.
The Katalon Studio Activation box appears as below.

-
Fill in the required information.
-
Server URL: enter the Subdomain you have configured (e.g., https://techwrite.katalon.io).
-
Email: enter your registered Katalon account.
-
Password: enter an API key generated in Katalon TestOps. See: API Keys.
-
Enable SSO as a User
If you are a new User, you must first accept the invitation to join an Organization. Then you will receive the SSO request email.
To enable SSO, follow these steps:
-
Go to your email and find the [Katalon TestOps] Verify Single Sign-On (SSO) authentication email, then click Click here to confirm in the email.
You will be directed to Katalon TestOps and see the below message.

-
Check the information, then click Yes, enable SSO to confirm.
After accepting the SSO request, you are automatically navigated to the Subdomain.

-
Click Sign in using SSO.