Manage Users
You need a Katalon account. Sign up to Katalon.
You must be the Owner or Admin of an Organization.
Invite users to join an Organization
Follow these steps:
-
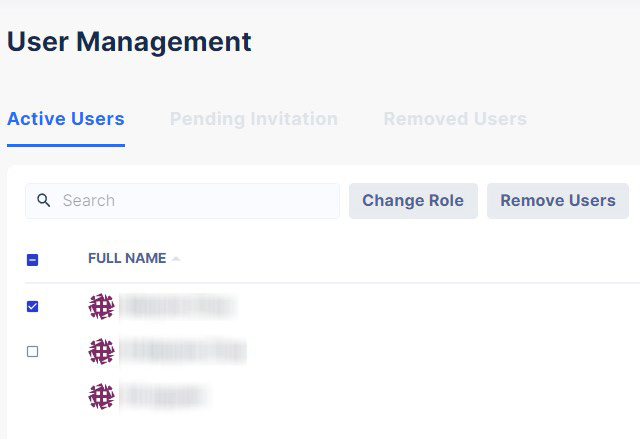
Click on the Settings icon at the top right corner of the TestOps homepage and choose User Management.

The User Management page appears as below.

-
Click Invite Users at the top right corner.
A new window appears, asking you to enter the email addresses.

You can enter multiple email addresses to invite members.
Note:-
Multiple email addresses should be separated by a Comma, Space, Tab, Alt, Out Focus, or Enter.
-
-
Click Next to go to the next step: assign licenses to your users.
-
Switch the toggle on to select the product licenses.

Note:-
For detailed information about assigning KSE/KRE licenses, see Grant Katalon Licenses.
-
-
Click Confirm.
You will be redirected to the Pending Invitation section. An invitation email has also been sent to the users you have invited.
-
Send your users this guide: Join TestOps Organizations.
Once your users follow the guide to join your Organization, they become Members of your Organization.
The invitation link is valid for 24 hours. After that, you will have to invite your team members again.
Alternatively, you can copy the activation link in the Pending Invitation section and send it to your users.
Manage users
Only the Owner or Admins of an Organization can do this.
View the members list
Go to the User Management page and click on the Active Users tab.
You then can view the list of all existing members.
Once your team members have accepted the invitations to join your organization, you will see their full names, emails, their roles, the dates they have joined your organization, their license access and their most recent access to the organization in the Active Users section.
You can update their permissions by changing their roles.
View pending invitations
Go to the User Management page and click on the Pending Invitation tab.

You can check all pending invitations here.
View the removed user list
Go to the User Management page and click on the Removed Users tab.
By default, the list is sorted by JOIN DATE.

You can view a full list of users you have removed from your organization.
Search users
In the Active Users section, use the search bar if you want to find a specific user.
In the Pending Invitations section, use the search bar if you want to find the invitation to a specific user.
In the Removed Users section, use the search bar if you want to find the user you have removed.
Revoke invitations
-
Go to the User Management page and click on the Pending Invitation tab.
-
Check the box next to the name to select and enable the Revoke button.
You can revoke multiple invitations by selecting multiple checkboxes.
-
Click Revoke.
The Revoke Invitation box pops up.

-
Double check the email addresses, then click Revoke.
You have revoked the invitations. The invitation links your team members have received now become invalid.
Remove existing users
Go to the User Management page, and click on the Active Users tab.
Check the box next to the User's name to select the User and enable the Remove Users button.
You can remove multiple users by selecting multiple checkboxes.
Click Remove.
The Remove Users box pops up.

Click Remove to confirm your action.
You have removed the users.
- The users cannot log in to your organization after being removed.
- The data removed users used remain in your organization and remain accessible.
- Removed users can be invited back any time.
- When you remove a user from your Organization, their associated machine IDs are also removed from the Registered Machine list.
Change user role
In an organization, different roles have different permissions. To differentiate the roles, see: Administrative Roles and Permissions.
- Check the box next to the user's name to select the user and enable the Change Role button. Check multiple boxes if you want to update the same role for multiple users.
 Click Change Role. The Change User Role box pops up.
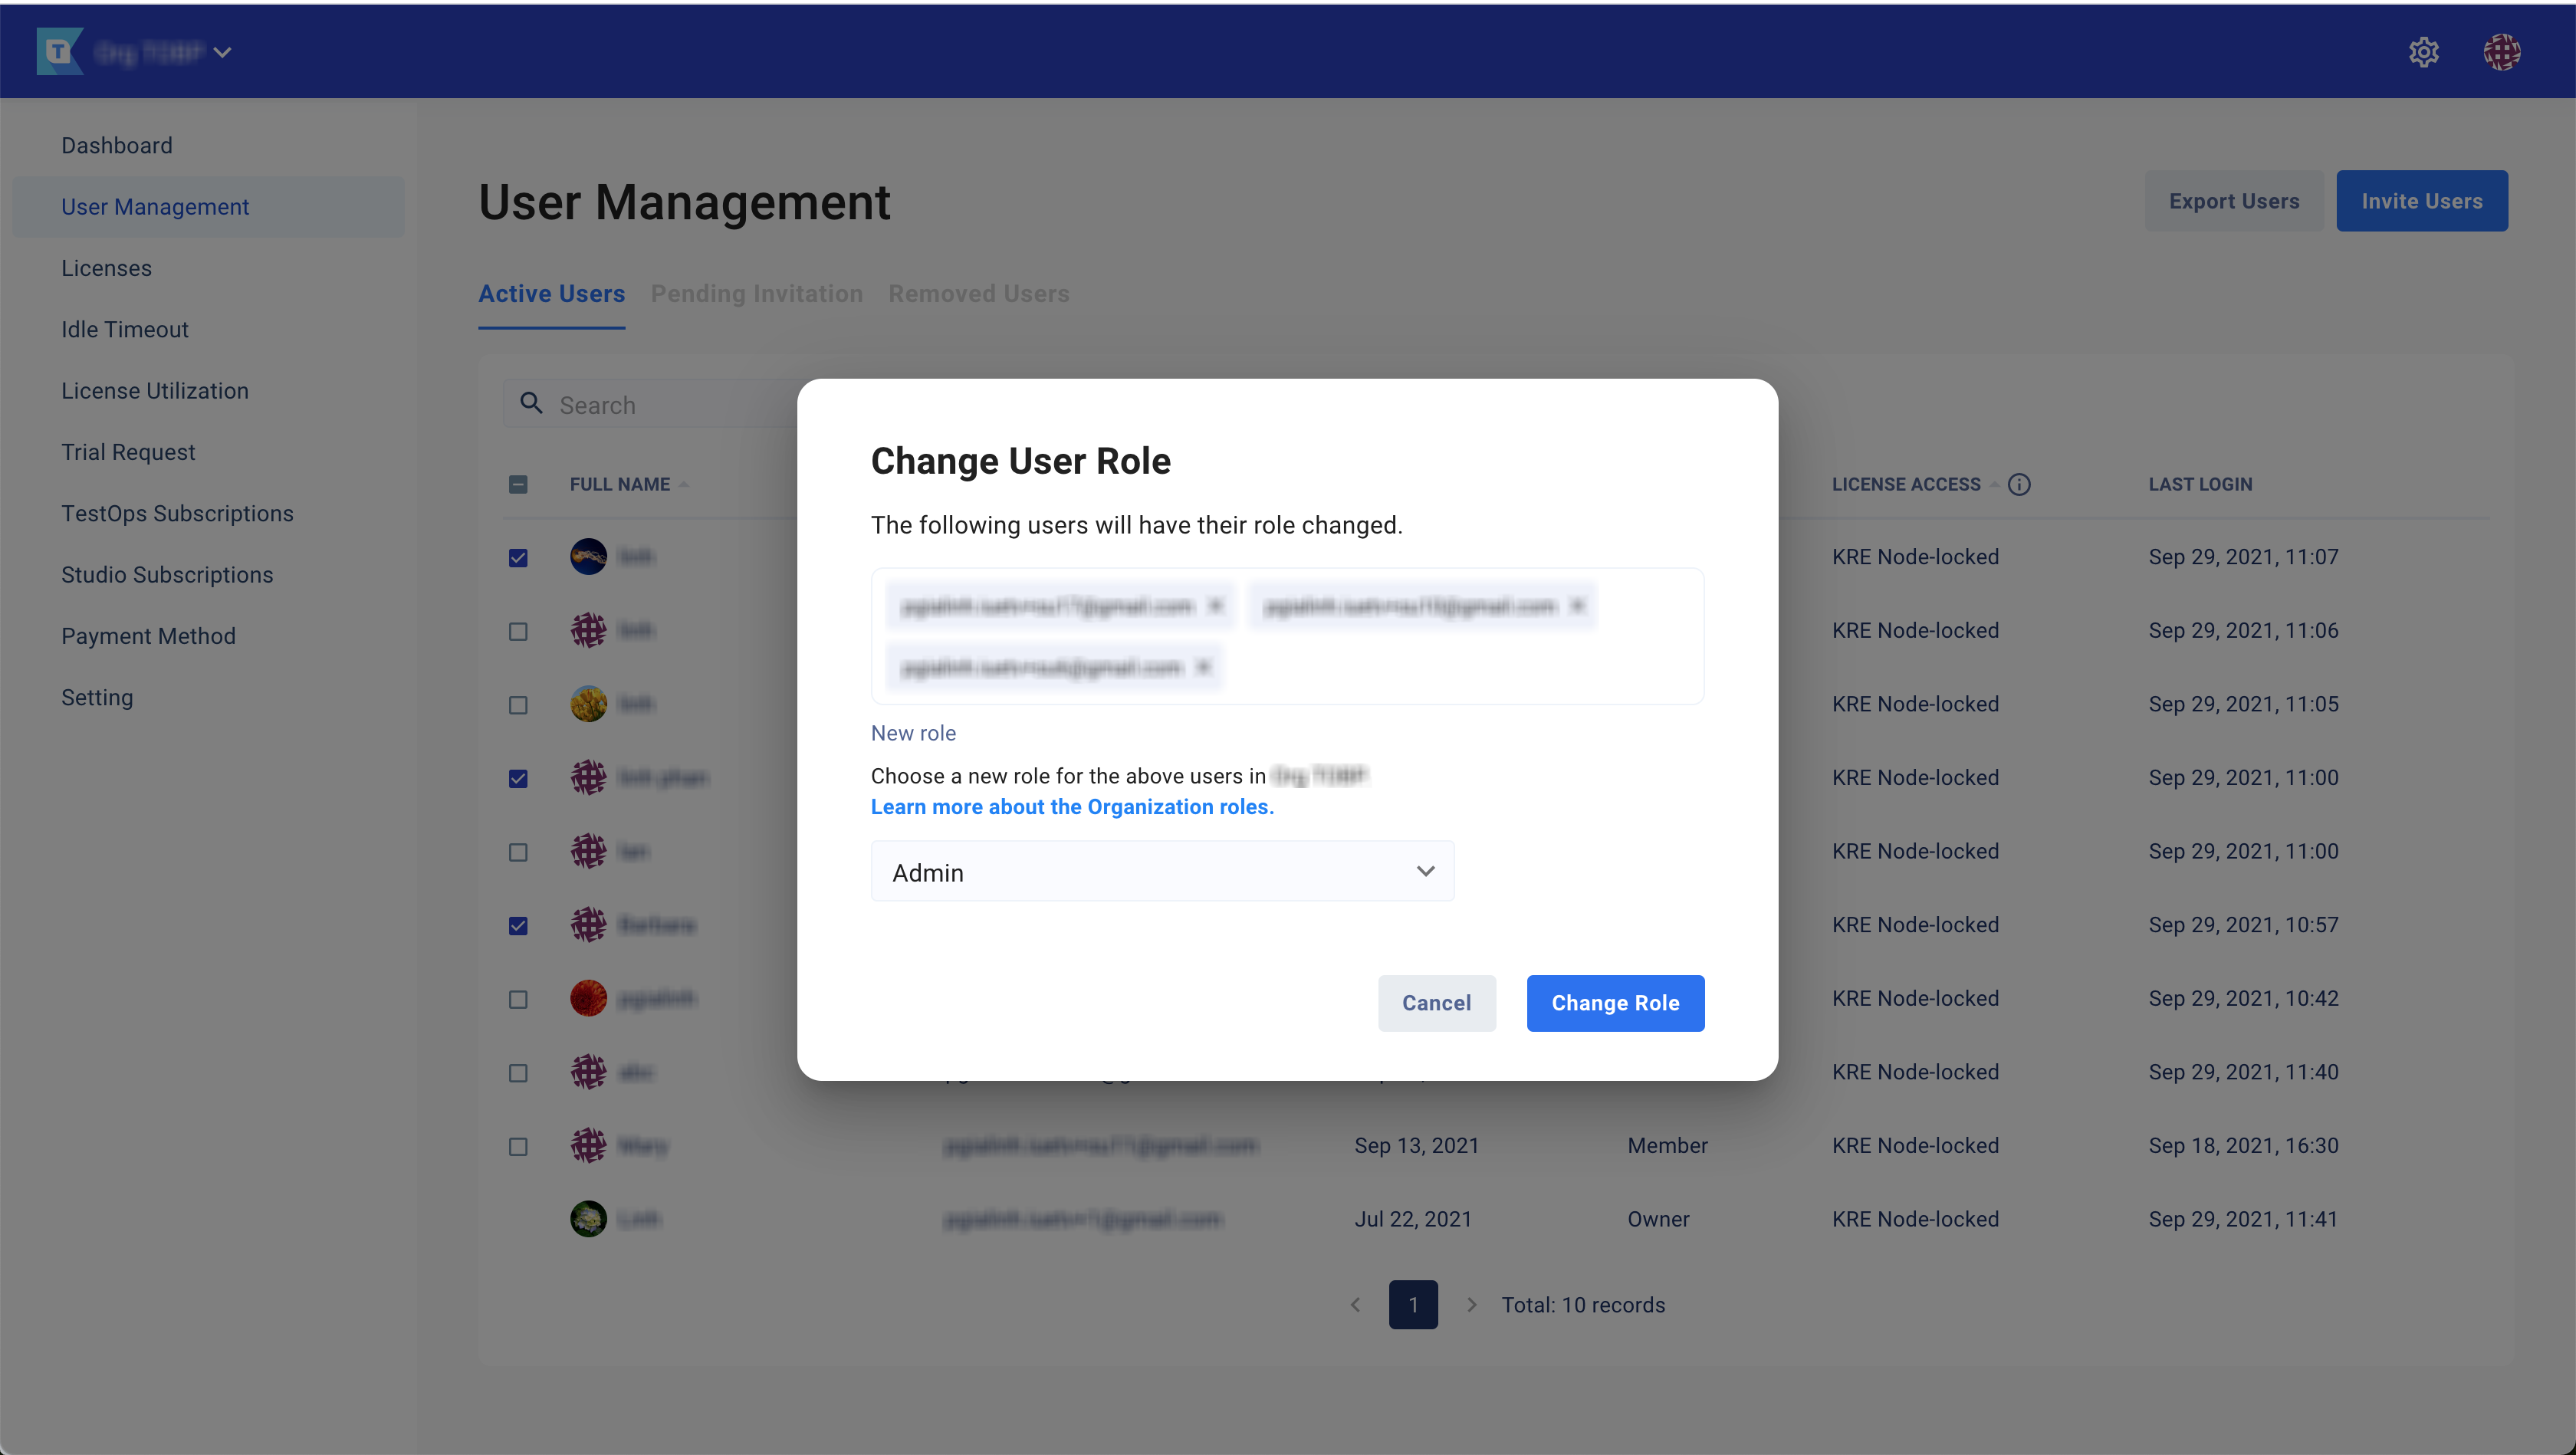
Export user list
-
Go to the User Management page.
-
Click Export Users at the top right corner.
The Users list is exported in .csv format.
The exported file contains Active Users list and Removed Users list.