Set up Katalon AI Agent
This document shows you how to set up Katalon AI Agent for autonomous test generation with TrueTest.
- You must be the Administrator of your Katalon Account. See: Administrative Roles and Permissions.
- You must have a Git script repository configured in TestOps with the Write permission. See: Upload test scripts from the Git repository to TestOps.
Add application under test
To configure autonomous test generation, first you need to define an application under test (AUT). The AUT specifies the production environment where Katalon AI can track all user interactions and leverage them in generating test cases.
Follow these steps:
- On the top right corner, select Settings > Autonomous Testing.The Autonomous Testing menu displays as below.
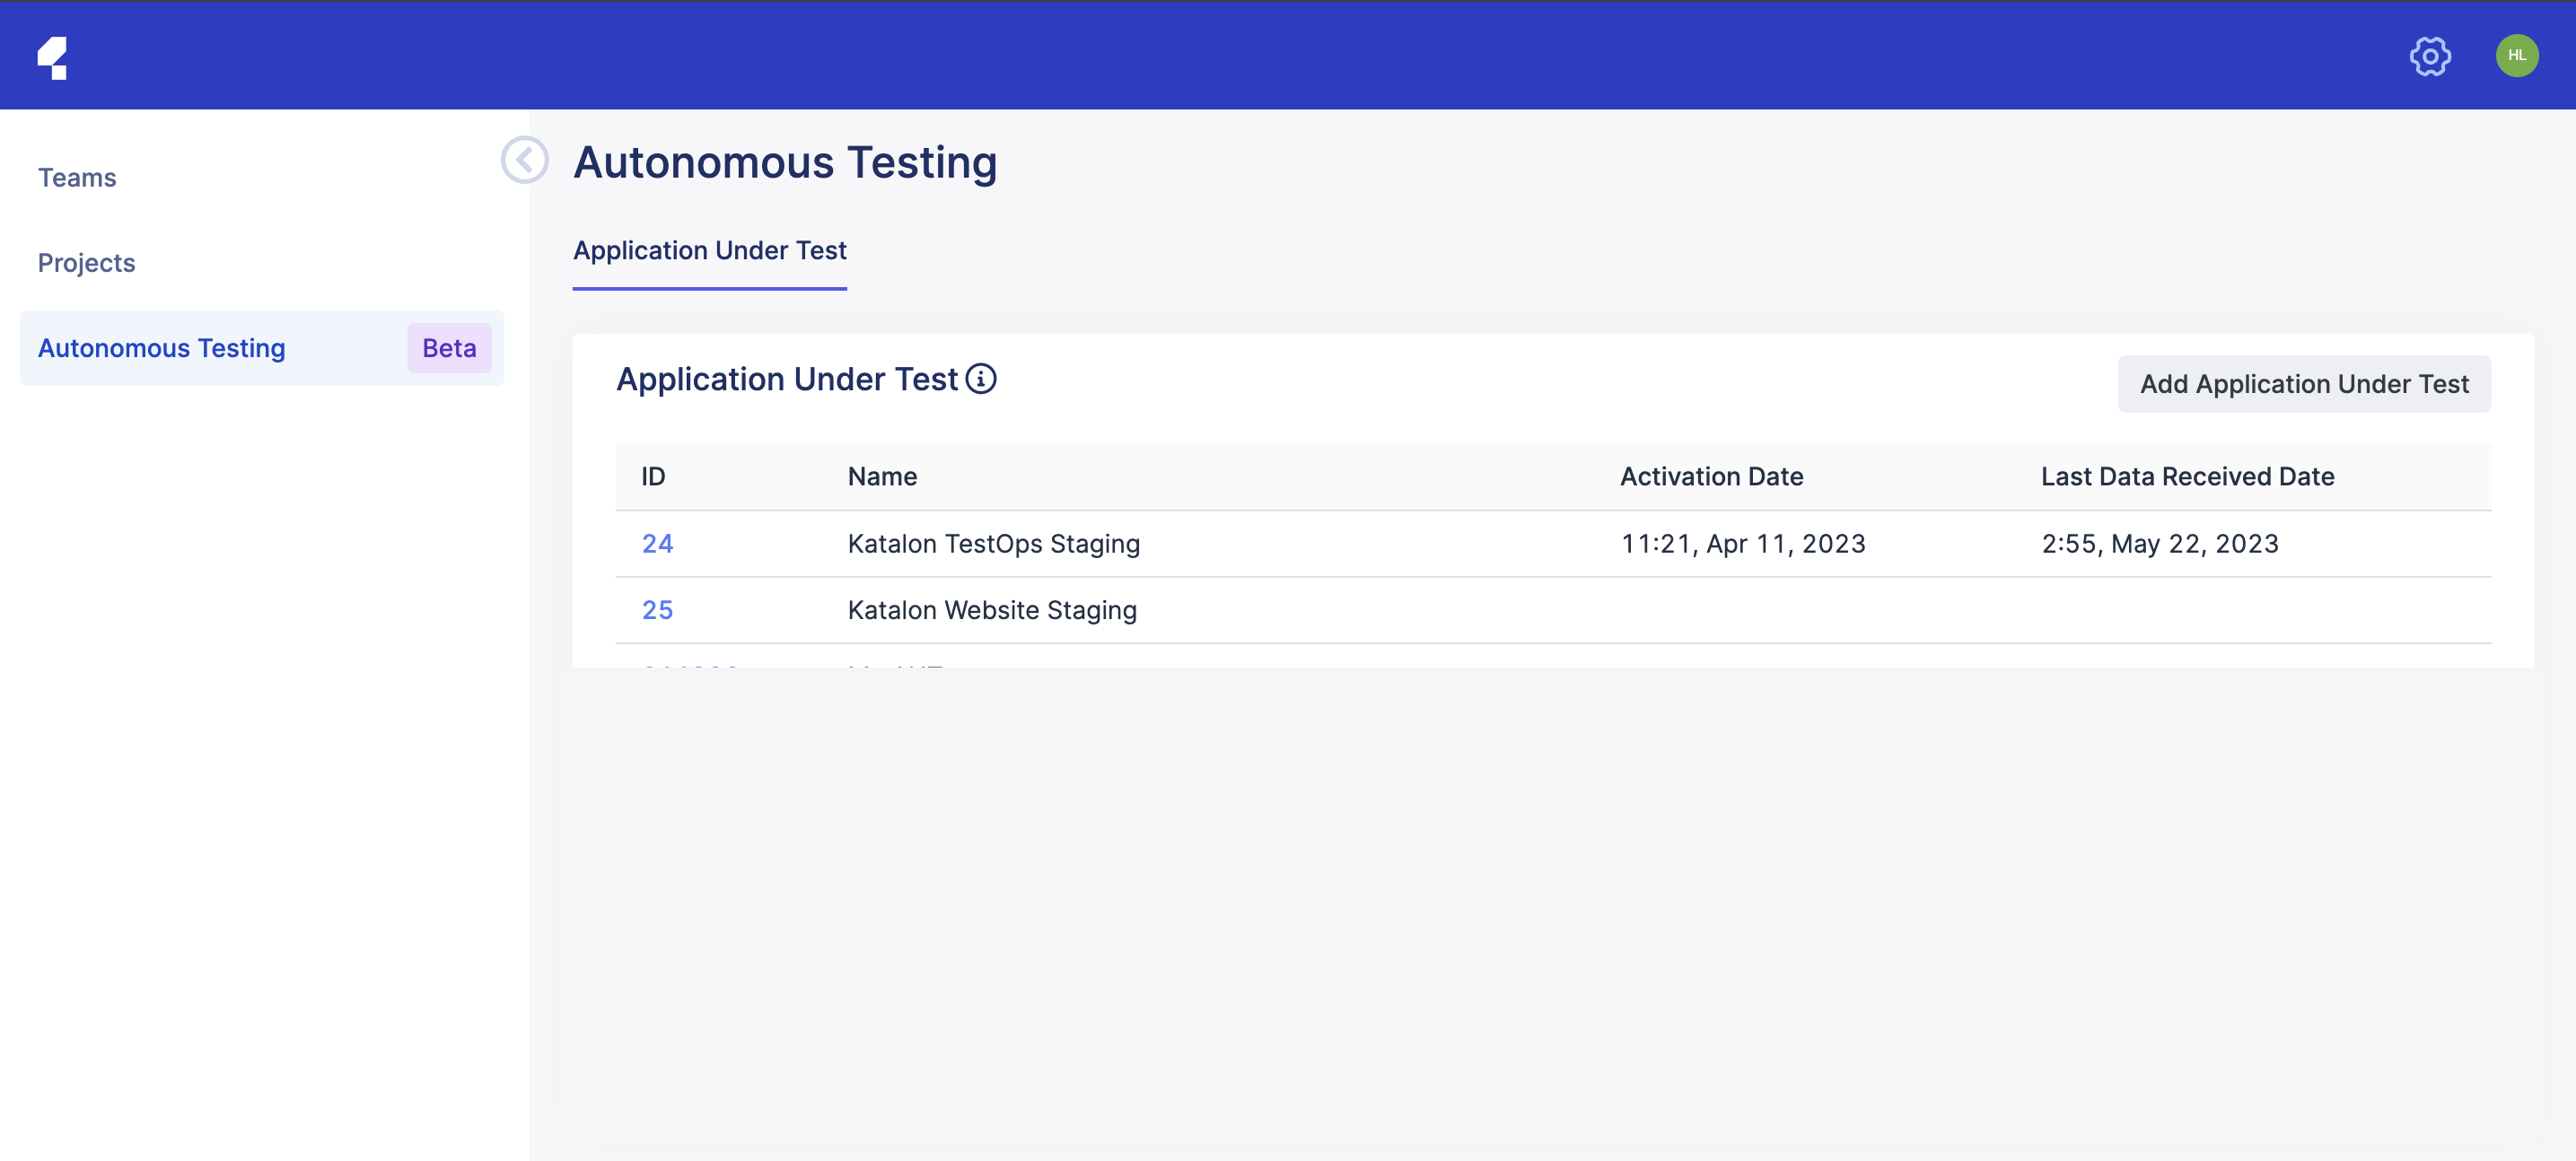
- Click Add Application Under Test. In the displayed dialog, provide the information of your AUT.
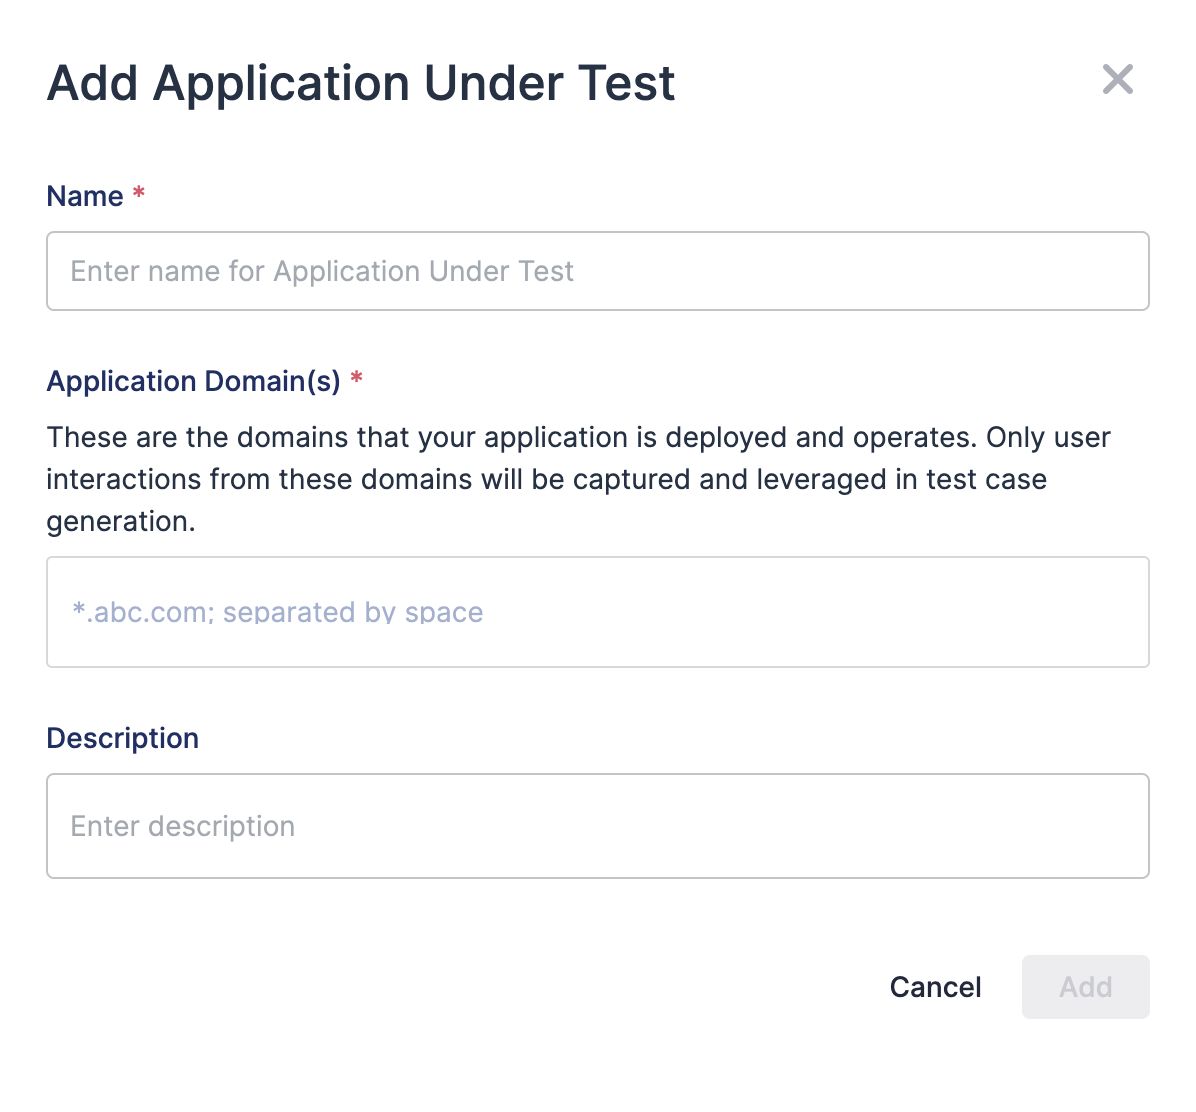
Name: The displayed name of your application.
Application Domain: The domain of your deployed applications. A user journey can involve multiple domains. This domain must not include: protocol name, "www" prefix, or trailing slash.
For example, valid domains can be *.katalon.com or katalon.com.
Description: The description for your application.
Configure the application under test
After the AUT is defined, you need to install the event tracking agent in your application, provide the development environment and link with the test project.
Select the AUT you want to configure. The configuration menu appears with three installation steps.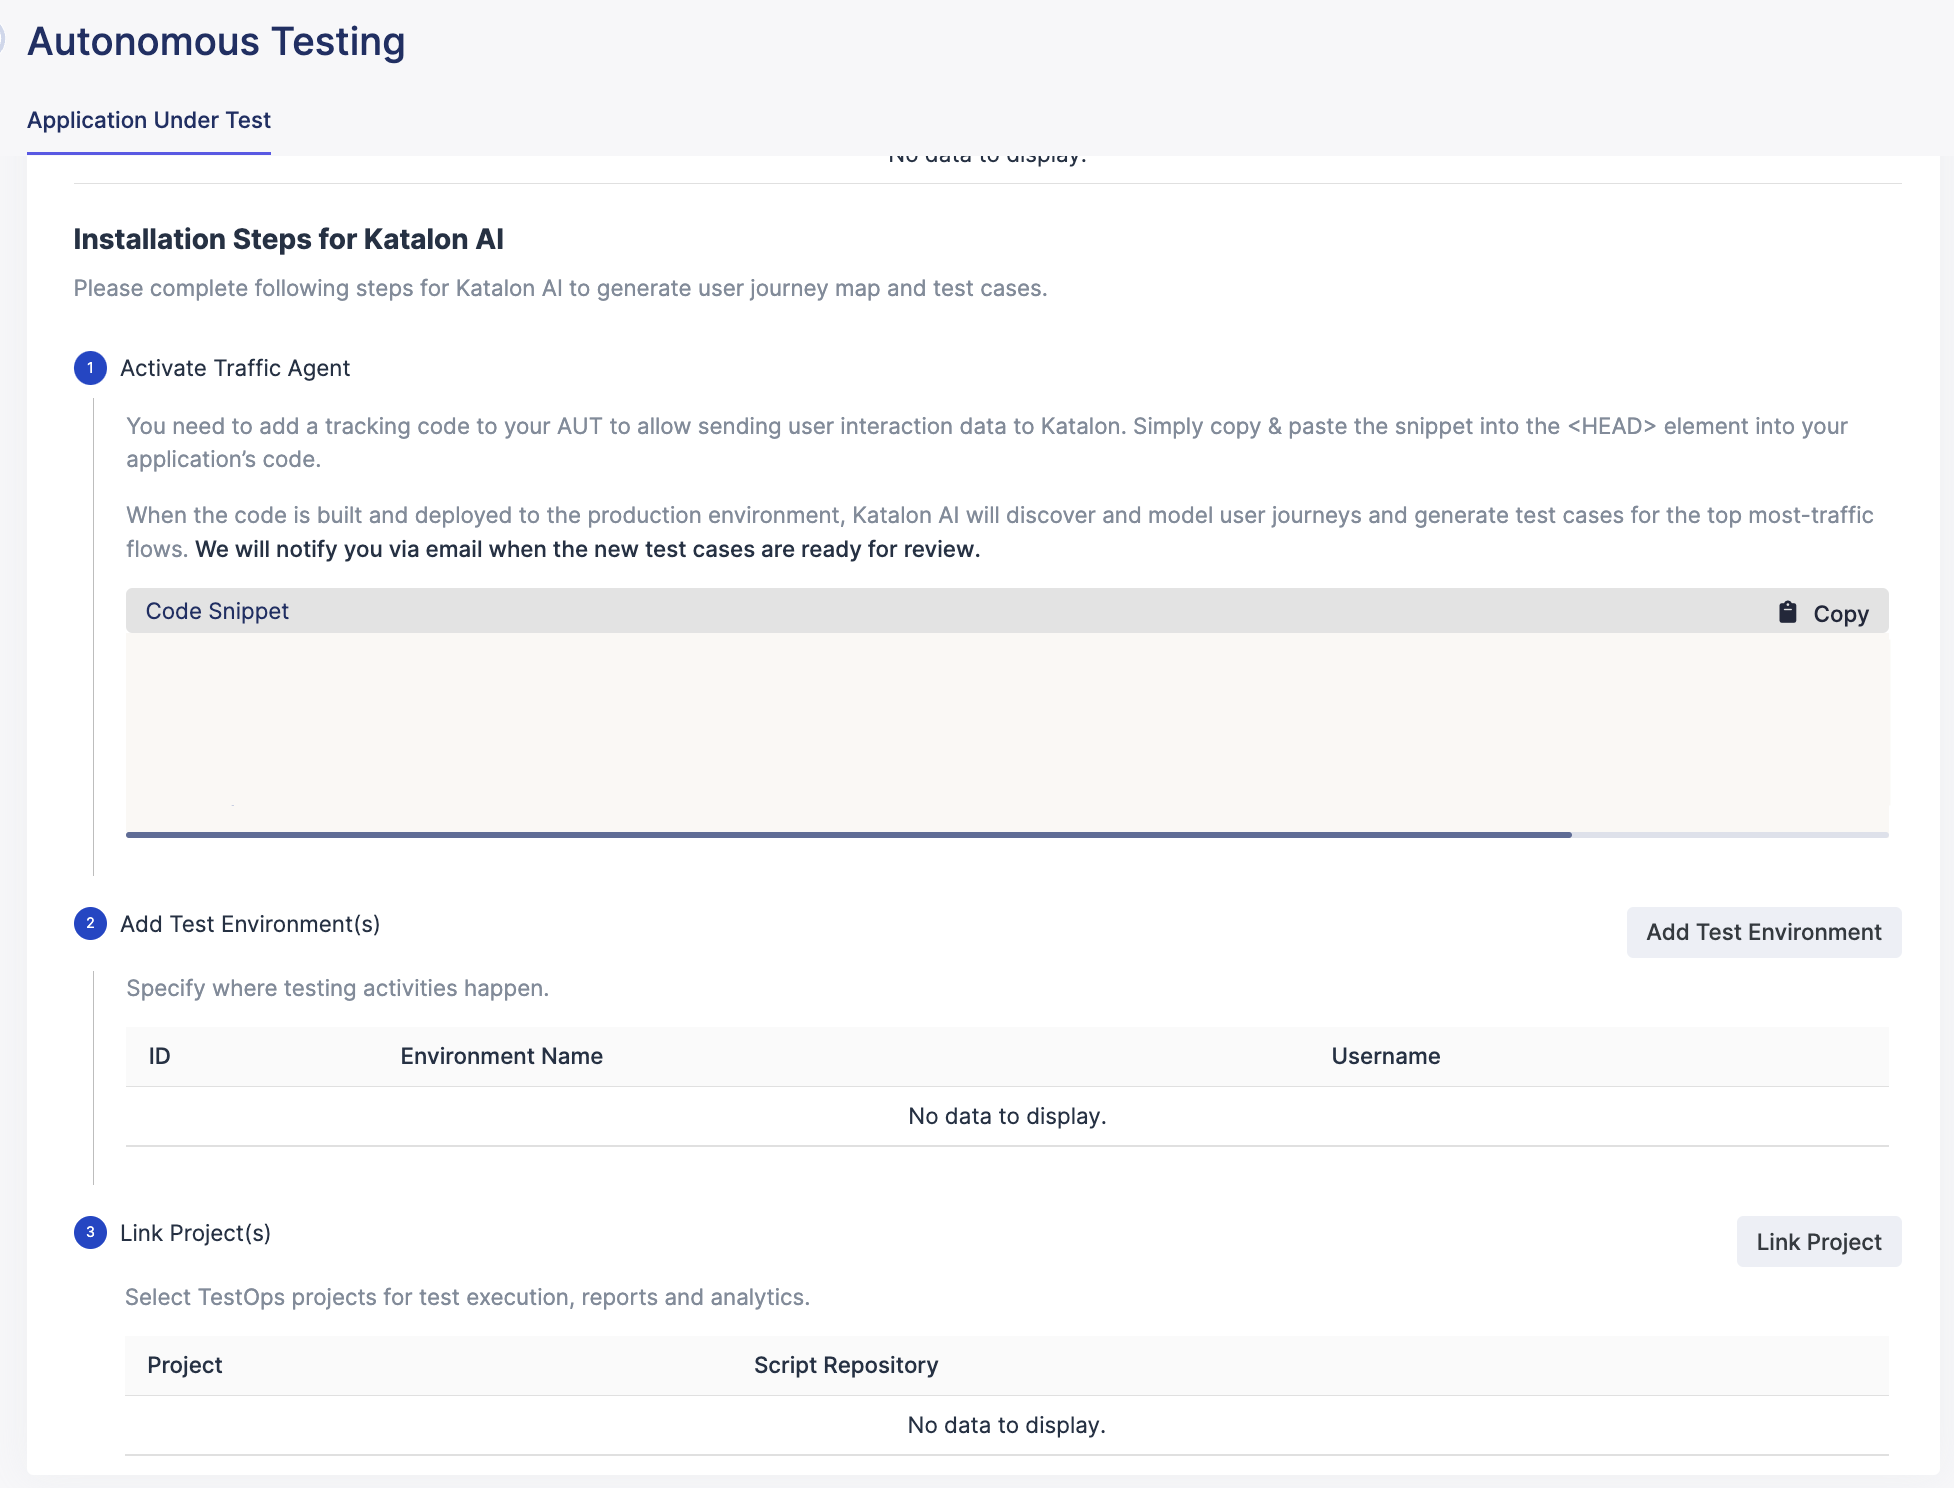
- Add Test Environment(s).
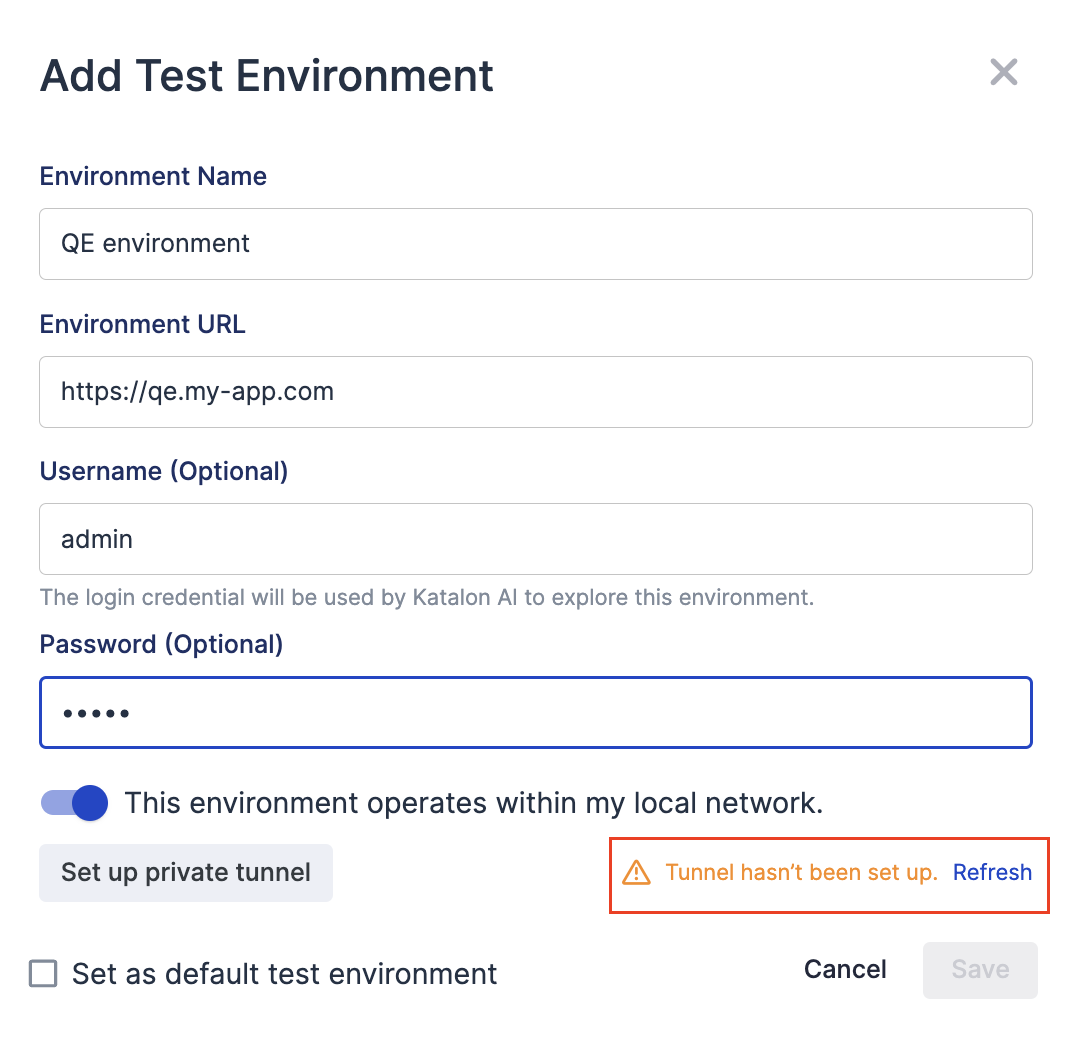
Click on the Add Test Environment button. In the opened dialog, you need to provide the test environment for the test execution. Provide the name and the URL for the environment. You can also provide login credentials for accessing that environment if necessary.
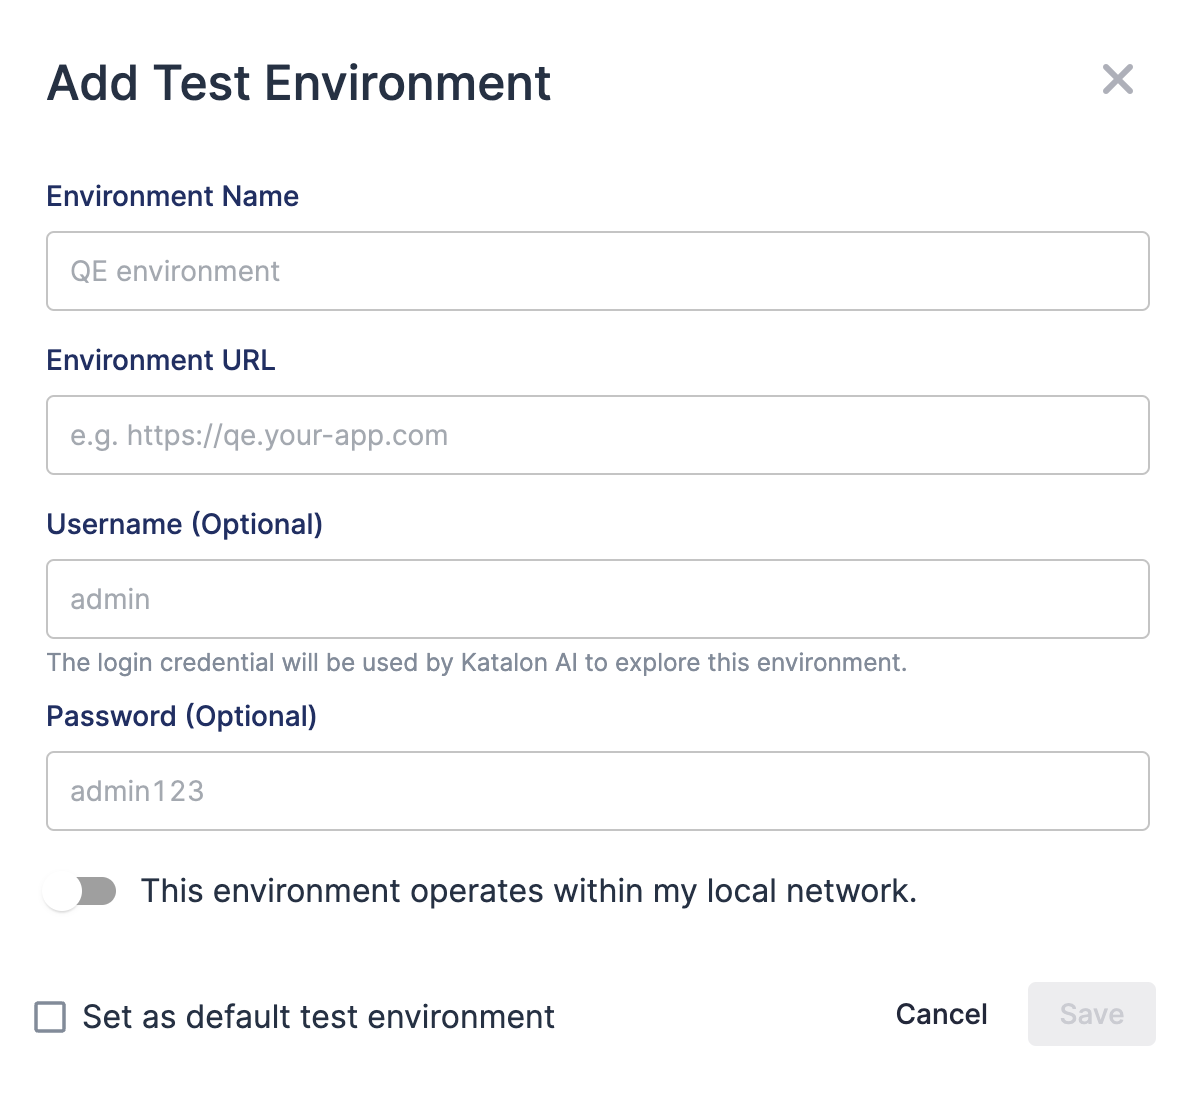
Environment URL should follow the correct pattern with the appropriate protocol and should not contain unnecessary trailing slashes. For example, a valid domain can be https://qe.your-app.com.
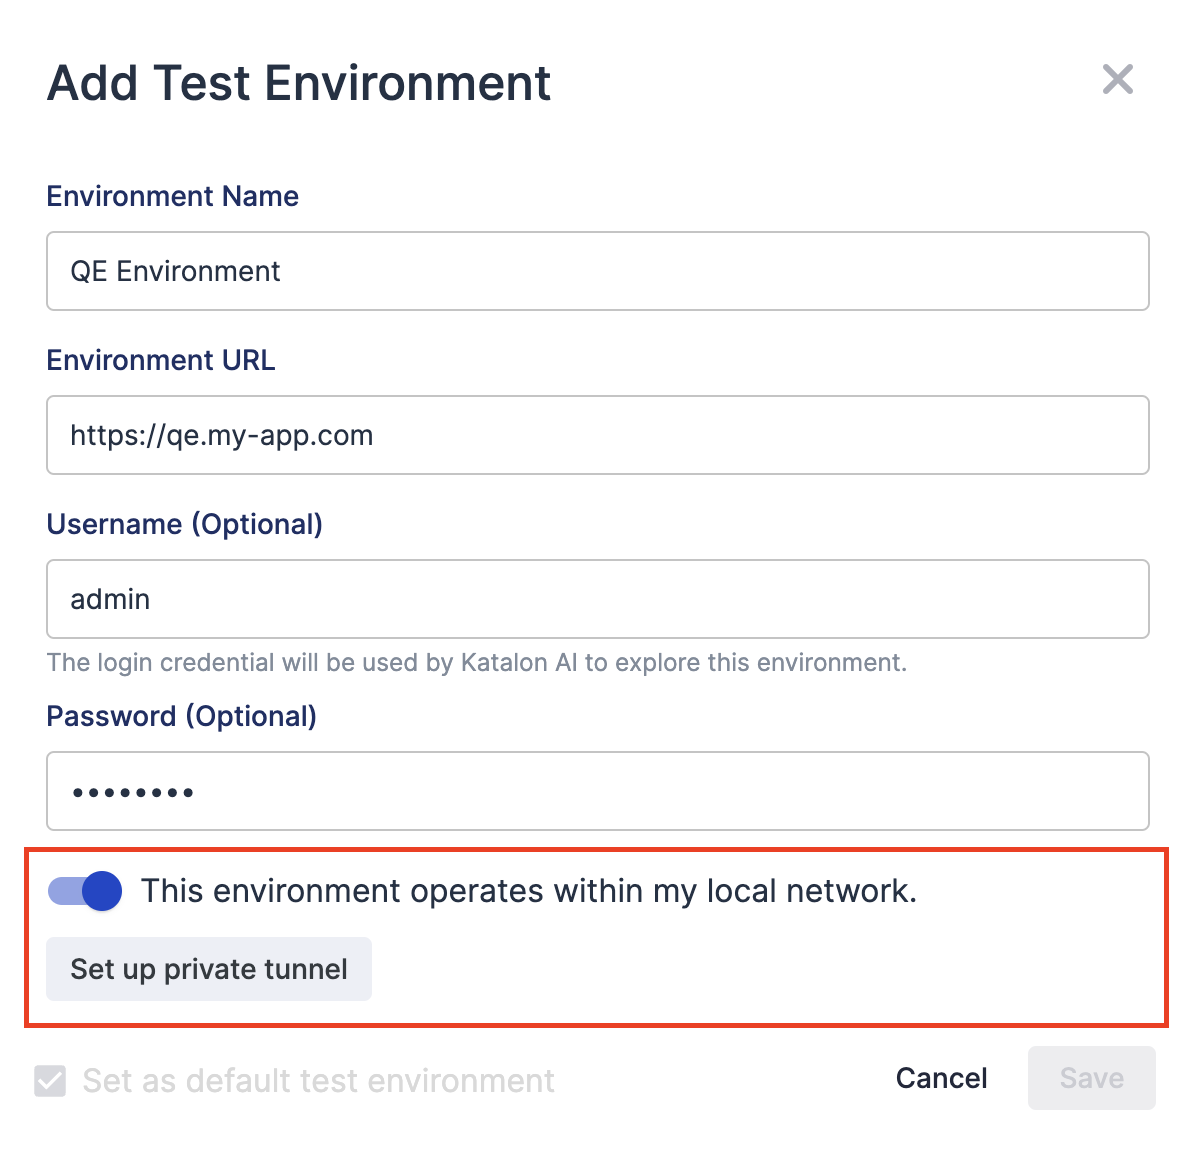
If your test environment is hosted in a private network, you can set up a private tunnel that enables TrueTest server to securely access the AUT. See: Set up private tunnel.
Katalon AI Agent will explore the test environment following the paths identified from user activities on the production environment and generate test cases accordingly. This step ensures the test cases generated can later be executable on the test environment.
- Link Project(s). Click on the Link Project button to specify the test project and script repository. The test cases will be committed and pushed to the script repository, which can then be executed as Katalon test scripts.Note:
The Git script repository must be configured with Write permission.

The application under test is configured for autonomous test generation.
After completing the three steps, navigate back to the Application Under Test list and check the Activation Date and Last Data Received Date data columns. These columns signify that the Katalon AI Agent has successfully tracked data from the AUT.
Set up private tunnel
This section shows you how to set up a private tunnel for Katalon TrueTest.
When setting up test environment for TrueTest, if you want to add a test environment that is hosted in a private network, you need to set up a private tunnel.
- A secure, reliable and high-performing network connectivity between the TrueTest server and the AUT hosted inside a private network.
- Simplified setup and maintenance process on user's side.
To set up a private tunnel, follow these steps:
- In the Add Test Environment dialog, enable the This environment operates within my local network option and click Set up private tunnel.
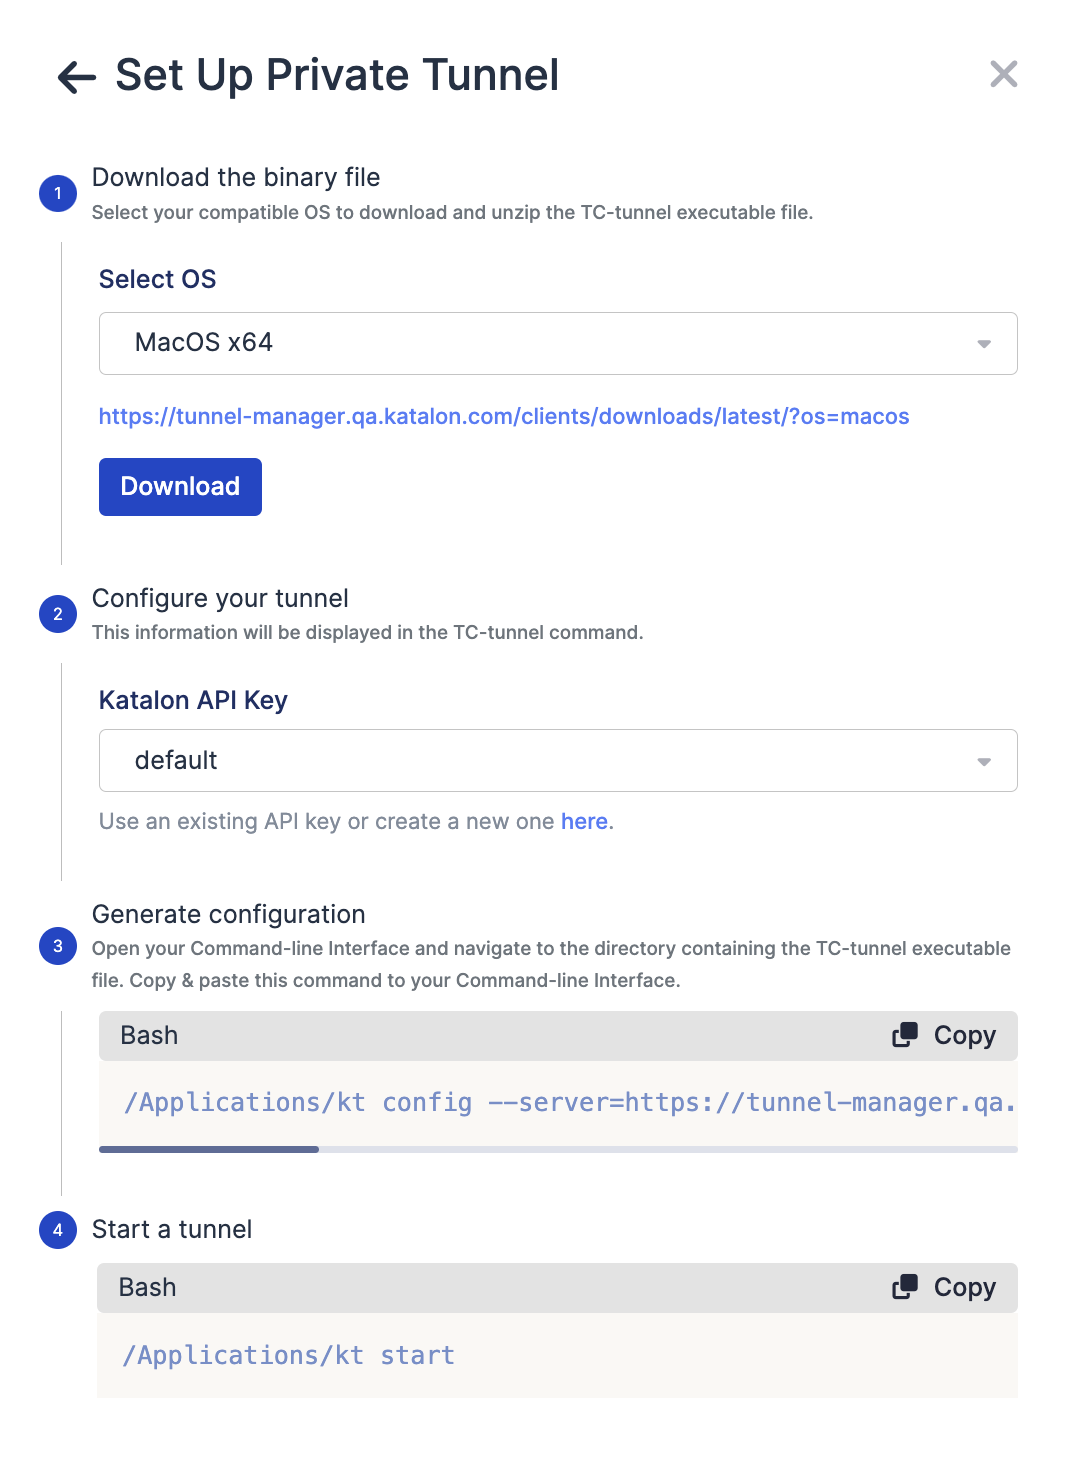
- In the Set Up Private Tunnel section, follow the installation instructions.
The tunnel client should establish a session.
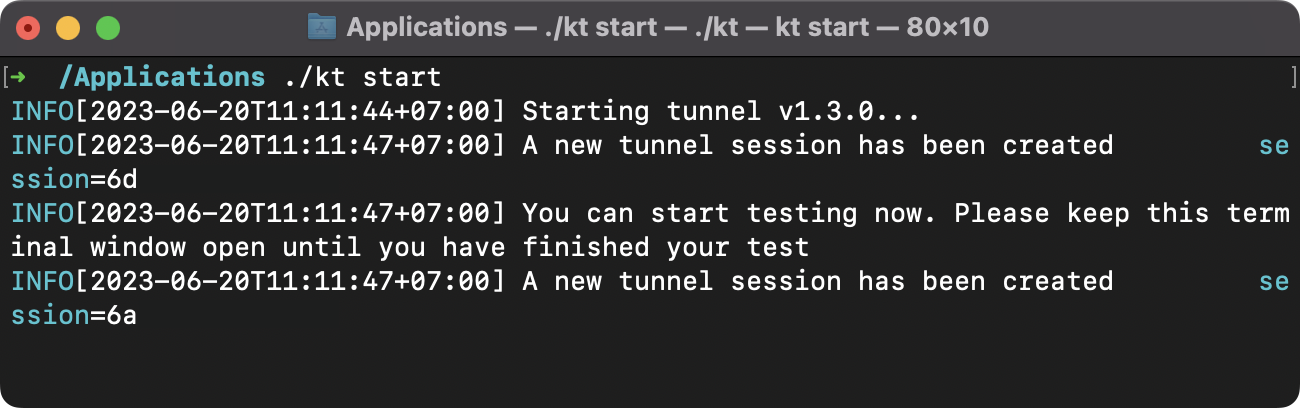
- After starting the tunnel client program, navigate back to the Add Test Environment dialog and click the Refresh button.